A Fixer Upper Junk Garden Plant Stand
August 06, 2017
This little plant stand was for sale at my friend's parents garage sale. Since I helped with the sale, I was able to take a few things free (it was only priced $1) to upcycle.
Here, I am brushing on a coat of vinegar and steel wool stain.
The plant stand had been outside a good many years and was not without issues, like rot.
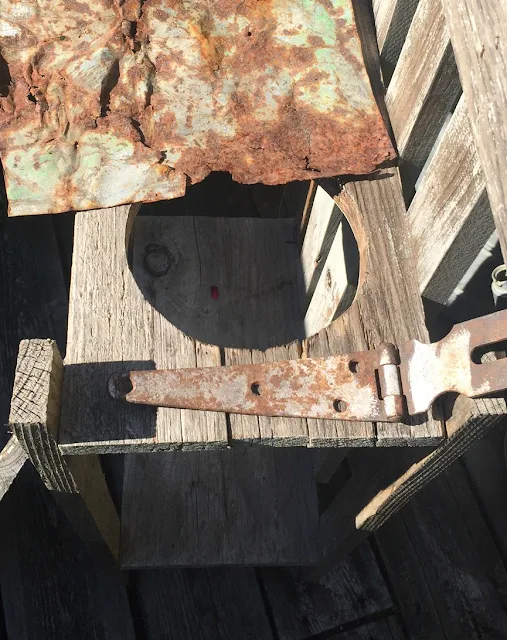
So I set out to save the little plant stand and junk-ify it too. I will be using this old hinged hasp to hold the right side together and add some rustic goodness.
This rusty scrap of metal is from my sister in law and fellow junk gardener, Kris. I am going to trim the metal with a tin snip and screw it's rusty goodness over some of the rotted areas.
Next to make a sign. I find that cutting the letters apart works best for me.
Next to make a sign. I find that cutting the letters apart works best for me.
I am making the sign for the plant stand with the Kaiser stencil and ivory craft paint.
I sprayed the stencil with a Krylon satin sealer to protect my stencil.
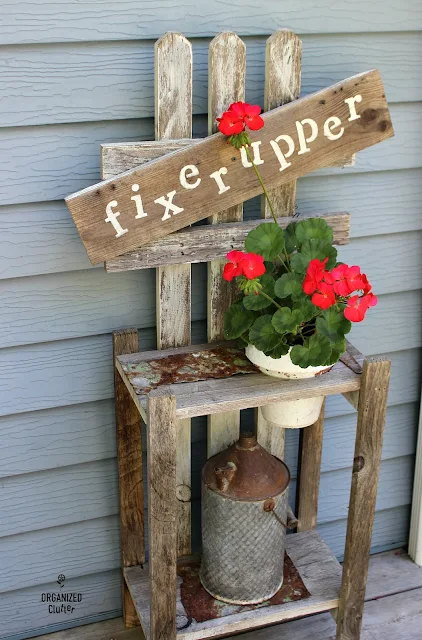
Here is the finished plant stand project.
Starter holes for all screws were drilled in the wood and metal first to prevent cracking.
I love the chippy and rusty goodness.
Now to add a potted geranium and junky oil can to complete the look.
My fixer upper junk garden plant stand is complete!
Thanks for visiting.

Sharing is caring


love it xx
ReplyDeleteOh, that is lovely!
ReplyDeleteAww, that is so cute! I'll be glad to take her off your hands!
ReplyDeleteYou are so creative! I love this fix! I like that you keept the broken idea!
ReplyDeleteLove your little fixer upper!
ReplyDeletePam
scrap-n-sewgranny.blogspot.com
Oh, I love it! You have such an eye for upcycling - it's amazing!
ReplyDeleteI love it! Very cute and creative. I could see building it from scratch with old wood, too. The design is just really cute.
ReplyDeleteThanks for letting us in on the project!
bookmarked!!, I like your web site!
ReplyDeleteGood save! If it were mine, I'd tone down the too-new-looking stenciled letters. Maybe scuff them up with some sand paper? Thank you for sharing.
ReplyDeleteIt's so perfect now Carlene. I love what you did and there's nothing better than the combination of rusty metal and old worn bits of wood. So much character
ReplyDelete