Decor Ideas for Flower Lovers
March 23, 2017
I got this package of floral napkins from my mom a couple nights ago. I have been wanting to try napkin decoupage on rough sawn boards ever since seeing a post from Sweet Pickins blog.
I purchased a couple of 5/8" x 6" x 6' rough sawn cedar fence boards from Menards. These are not treated lumber and are very inexpensive.
I stained my 15" board with vinegar and steel wool stain.
This is what my napkin looks like unfolded. First, I removed two of the white back layers so I was left with just the top printed napkin ply.
I watered down my Mod Podge Waterbase Sealer, Glue and Finish (8-Ounce), CS11301 Matte Finish as suggested by other napkin decoupagers.
Next I brushed my thinned Mod Podge on my board. With the thinned Mod Podge you can move the napkin around a bit. After I got it in place I used cling wrap over the napkin and smoothed out and pressed down the napkin into the wood grooves. The cling wrap kept the napkin from tearing. I found this tip from another blogger Salvaged Inspirations.
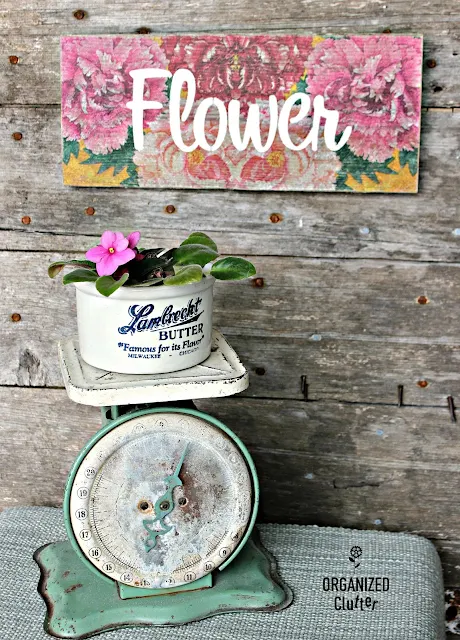
After the Mod Podge was dry, I stenciled on the word FLOWER. I used ivory craft paint for the lettering. I sanded off the napkin on the edges with 220 grit sandpaper. Easier than cutting. As you can see, my board was longer than the napkin. I didn't like the look, so I sawed the edges of board that were showing on each side. I sealed the sign with a Krylon 51313 Satin Finish Crystal Clear Interior and Exterior Top Coat - 11 oz. Aerosol and after it was dry, I lightly sanded the napkin to give it an aged look. I think you could sand prior to a coat of sealer, but I didn't want to tear the napkin. The napkin still distressed pretty easily after one coat of sealer. After distressing, I sealed the sign again.
I added a sawtooth hanger to the back and hung my sign. As you can see the one ply napkin is so transparent that the wood grain is visible through it.
I'm glad I tried this technique. I plan to do a larger piece next time, now that I have completed this practice project.
While I can accessorize my house with thrift shop finds almost exclusively, I do need to buy a few fun NEW items from time to time. Like these galvanized flowers.
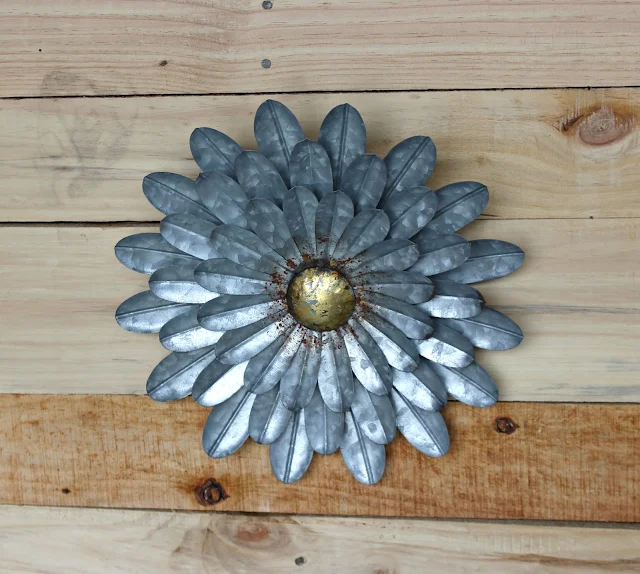
Yes, I purchased a set of five galvanized wall flowers.
This is the SET OF FIVE METAL FLOWER WALL HANGINGS from the Amazon listing. I can hang them on my new garden shed built last fall (that needs decor and landscaping) or I can take the pot lids off my old barn door and hang them on the door. I think they will be fun wherever I put them!

Sharing is caring


Carelene I love your tutorial on using a flower napkin (1 layer) to make the background for your Flower sign, pinned of course - such a helpful as well as great idea.
ReplyDeleteJoy
Thanks for the info. It turned out great! I never thought to water down Modpoge or the cling wrap!
ReplyDeleteIt looks great!
Smiles,
Alice
wow i think i love this lol xx
ReplyDeleteLOVE LOVE this!!! I've used napkins to make cards and never though about applying it to a wood piece! So pretty! LOVE IT!
ReplyDeletedeb
I love the decoupaged timber. It looks great.
ReplyDeleteLove the flower board! It looks great! Wish I could find some napkins as pretty!
ReplyDeleteI like your flower board done with the pretty napkin.....I used napkins to decoupage a small table and it turned out cute.
ReplyDeleteYour metal flowers are going to be too much fun to decorate with......I bet you find place after place where they look wonderful!
Thanks for sharing,
Tammy
Wow! Never thought of using fancy printed napkins for decoupage. Great idea. And your board looks beautiful. Love the grouping of galvanized flowers too.
ReplyDelete