From Fall Vegetable Grater Pumpkin to Halloween Jack o'Lantern
September 17, 2017
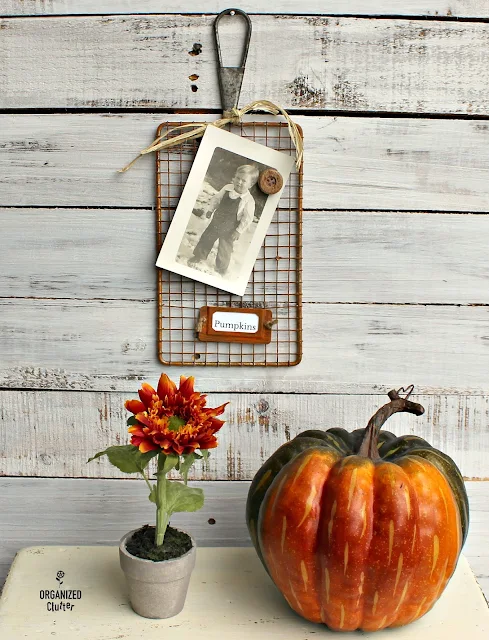
Back on August 24th, I re-purposed this vintage vegetable safety grater into a "pumpkin" photo holder.
Today, I up-dated my re-purposed grater pumpkin into a jack o'lantern.
Paint details and instructions from the first post can be found below:
The first step was to dry brush the bottom of the safety grater with Deco Art Chalky Finish Paint in Heritage. Most of the paint I loaded on my brush was brushed onto my newspaper.

I also dry brushed this label holder from Hobby Lobby. I printed out the word "pumpkins" on card stock using a font in Picmonkey 125 size font. I sprayed the label holder and grater with Krylon Matte Low Odor Clear Spray .
.
I use these label holders so often that I have made a cardstock template to cut out cardstock labels to display in the holder. If you want to secure the paper to the label, you could use glue or tape. I have my label temporarily being held with a piece of jute, (in case I want to change the label, and I did).
Then I simply tied on a couple pieces of jute to my pumpkin stem.
Does my grater look like a pumpkin? Or just a rusty grater, LOL? I used a magnet with a hot glued button to attach my photo.
Jack o'Lantern photo instructions:
I have a Picmonkey photo editing subscription. I think it costs approximately $32 a year.
There is a free version as well that does not have quite as many cool features as the paid subscription, but it works!
My first step in the jack o'Lantern project was to find a background color that matched the orange paint on my grater. I went to the yellowish oranges and then moved the bar below the colors to the left to darken the color.
Next I clicked on the pumpkin icon at the far left in blue.
I then selected a jack o'lantern face. I made the image larger and exported it.
I also rotated the face graphic 90 degrees and printed it on 5" x 7" glossy paper. (My paper size is incorrect in this graphic.)
I again chose design to create a name tag graphic. I did not choose a color for the name tag background. I went with white.
I typed Jack o'Lantern in the text box and sized it to 99, using the Coolock Black font. I printed it on 5" x 7" cardstock. I did not click on fit to page setting on the print command.
I cut out my jack o'lantern picture. This is 5 x 7 paper and as you can see, my picture is a square.
I used a small clothespin to attach the jack o'lantern face photo. If you are not going to change the name tags, I would glue the tag to the back of the holder and under the jute. If you plan to change it up, use a piece of scotch tape under the jute to hold your tag in place.
So do you like it as a Halloween project?
Do you like it as a fall project?
Or do you like it both ways?

Sharing is caring


Carlene your grater made a cute pumpkin, and a fun way to display a favorite photo. It even makes a cute jack-o-lantern, and it's great because once Halloween is over you can use as a pumpkin again.
ReplyDeleteI bought a couple strainer that I'm going to turn into pumpkins.
I love this idea and love how your grater pumpkin turned out!
ReplyDeletePam
scrap-n-sewgranny.blogspot.com
Cute idea! Amazing!
ReplyDeleteCarlene, I actually really like the grater with the photo on it and the little "pumpkin" sign underneath. I think it speaks to me because I used to call my little ones Pumpkin.
ReplyDeleteThe other design is just okay.