Thrift Shop Wooden Wall Bin & Barn Wood Frame Project
April 26, 2018
These wooden wall bins were a thrift shop find.
I removed the back board, and separated the bins.
Two of the bins were painted, stenciled and hung on the hutch of my desk.
You can see the transformation of the buffalo check wall bins HERE.
So what did I do with the last wall bin? Read on...
I then sanded the edges to lightly distress the bin. I also sanded the interior portions of the bin to smooth out the brush strokes.
Next, I pulled out one of my *Old Sign Stencils grain sack stripe stencils.
Grain sack stripes are great on fabric or wood!
So I centered my stencil down the front panel of my bin.
I then pounced on three red grain sack stripes using Deco Art Chalky Finish Paint in Rouge and one of my Dreamweaver Stencil Brushes.
I found this 11" x 14" barn wood style frame at the thrift shop too!
It didn't have any glass.
But I didn't need the glass anyway for this project.
I added section of 1" x 6" x 4' dog-ear cedar fence picket to the back of the frame with screws.
I brushed on one coat of Varathane Weathered Wood Accelerator to make my new fence board look like my frame.
The weathered wood accelerator works very well on cedar, rough sawn boards.
The weathered wood accelerator works very well on cedar, rough sawn boards.
Here is the fence board after just the one coat.
I waxed the wall bin with Minwax Paste Finishing Wax Natural .
.
The metal label frame was put back on the wall bin, and I printed a tag with a script font on Picmonkey.
Then the bin was screwed onto my fence board from the back, and a sawtooth hanger was added to the top back of the fence board.
It's done!
The metal label frame was put back on the wall bin, and I printed a tag with a script font on Picmonkey.
Then the bin was screwed onto my fence board from the back, and a sawtooth hanger was added to the top back of the fence board.
It's done!
So what can you do with my new wall bin/frame?
You can add faux greenery and use it like a wall pocket.
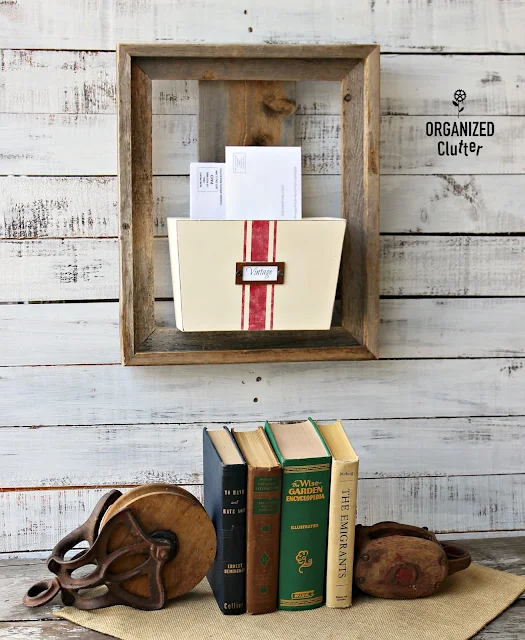
I displayed it here with a couple of old pulleys with weathered wood and old books.
Or, you could use it as a wall mail bin by the front door.
One of my readers suggested hanging it on the front door with different seasonal greenery! And you could change the paper tag for a different greeting as well!
Thanks Christina for the great tip!
One of my readers suggested hanging it on the front door with different seasonal greenery! And you could change the paper tag for a different greeting as well!
Thanks Christina for the great tip!
I like the creamy white bin with just a hint of red with the rustic woods.
*Old Sign Stencils provided me with complimentary samples.
All opinions about these fabulous products are my own.
Other grain stripe projects:

Sharing is caring


Sweet ideas Carlene! I could see the bin with greenery as wreath, of sorts, on a front door. Fill the bin with season and holiday appropriate decorations. See what you've done? lol My mind is reeling. Thanks always Carlene!!
ReplyDelete~ Christina in SW FL
Great ideas!
DeleteYou've done wonders to those wooden bins, Carlene. I just ADORE both revamps so much!
ReplyDeleteI've still yet to get my thick grain sack stripes wet with paint and here you go killin' it with yours... I'd better hurry up! :D
I love both bin makeovers! They both turned out very pretty! I see these bin pretty often at Goodwill, but haven't ever thought of taking them apart.
ReplyDeleteSweet project Carlene! I love all the possibilities.
ReplyDeleteI'm including this project in my Picture Frame Ideas over at My Repurposed Life!
pinning!
gail