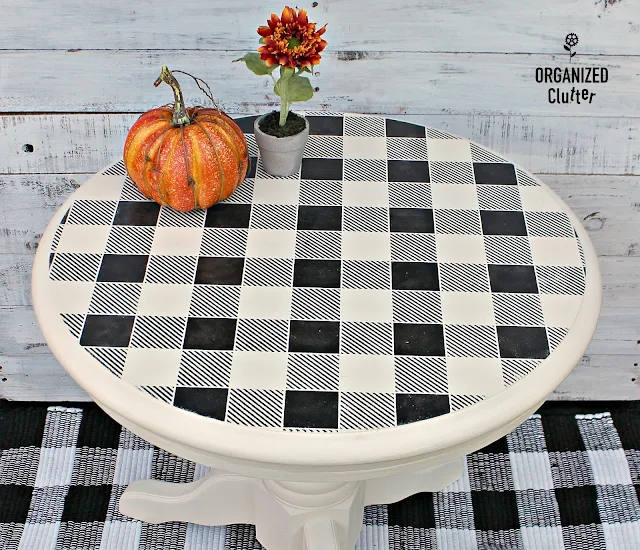
An Oak End Table Upcycle with Paint & Buffalo Check Stencil
September 02, 2018
I recently shared with my readers that I moved my mother into assisted living. It was a big job! My mom has a lot of stuff.
This round, oak, end table was one item that she didn't need. I gave it a makeover for my daughter's townhouse.
(When you click on the bold Amazon, Old Sign Stencils or Dixie Belle Paint Company affiliate links you will be taken to the products I use for this project. If you order it does not change the price or service at all. As an Amazon Affiliate, Old Sign Stencils Affiliate or Dixie Belle Paint Affiliate, I earn from qualifying purchases.)
I started to paint the top of this table and had a little stain bleed through.
I immediately pulled out a great product for stain and odor blocking, *Dixie Belle Paint Boss in Clear . I used two coats. I used to use shellac or a shellac based primer but hated the odor. Boss is very low VOC.
*Dixie Belle Paint Company has provided me with complimentary paint products. All opinions about the products are my own.
*Dixie Belle Paint Company has provided me with complimentary paint products. All opinions about the products are my own.
The paint I used for the table is *Dixie Belle Paint Chalk Finish Paint in Drop Cloth . I like whites with a little creaminess.
I brushed on two coats with a round paint natural bristle paint brush.
Now to add the magic of buffalo checks to the top of my table with a stencil from **Old Sign Stencils.
Since my stencil is too small for the table top, I center the stencil (measure with a ruler) in the center of the table, and tape it with blue painter's tape. Then I pounce on black craft paint.
The buffalo check stencil is very detailed. MAKE sure your brush is almost dry. I squirt paint out on a paper plate, dip the brush into the paint and pounce most of the paint off on the paper plate before stenciling. Another trick is to pounce first on the larger square when your brush has more paint, then move to the diagonal lines. I NEVER make the pattern solid. It always has areas that are more opaque than others. I like it that way.
On a few projects, I used a dry brush and the pattern was lighter than I liked. I then pounced on another coat. Better to add another coat than to use a messy brush.
Once the center stencil is finished, you must move your stencil up, down, right and left to finish off the tabletop. Always make sure your stencil is lined up perfectly before stenciling the next section of your table.
If you get minor bleed through around the stencil, you can fold a small piece of 220 grit sandpaper into fourths and use the inside corner to gently sand very small spots. If you get a larger bleed under the stencil or screw up positioning the stencil, you can always sand and repaint. ( I have done that)
I used Dixie Belle Paint Company Satin Clear Coat on the pedestal and legs.
Dixie Belle Paint Company's website has many useful videos, FAQ's, and tips about the use of their products.
The best tip I can give you on the satin clear coat is use a damp brush and apply a very light coat. (Dixie Belle Paint need not be waxed or sealed.)
For the table top, I used Dixie Belle Paint Company Gator Hide , a very water resistant top coat, perfect for an end table. It has some shine.
I've found that buffalo check plaid goes with every holiday!
I love white with black buffalo checks with autumn orange and rust hues.
I think my daughter's gonna love it!
Other buffalo check projects:

**Old Sign Stencils provided me with complimentary samples.
All opinions about these fabulous products are my own.

Sharing is caring


love this! Looks great!!
ReplyDeleteWhat a charming table now!
ReplyDelete