Easy & Inexpensive DIY Brown Craft Paper Stenciled Scroll Sign
January 31, 2019
Early in December, I got the idea to make Christmas tree ornaments out of brown craft paper.
I used a thin dowel painted black for the scroll ends, and used string to hang my ornaments. All the details on this project are HERE.
Well the ornaments barely used up ANY of the brown kraft paper roll.
I decided to make a larger brown paper stenciled sign.
My original plan was to cut the paper roll, core and all, in half with the chop saw.
(When you click on the bold Amazon, Old Sign Stencils or Dixie Belle Paint Company affiliate links you will be taken to the products I use for this project. If you order it does not change the price or service at all. As an Amazon Affiliate, Old Sign Stencils Affiliate or Dixie Belle Paint Affiliate, I earn from qualifying purchases.)
But I hit a snag. There was no core in my brown kraft paper roll. It was just rolled paper.
Plan B was to use a core from a similar sized roll of Christmas wrapping Paper. The brown rolled paper (without the core) was pushed inside the Christmas paper roll core. Then the core and paper roll were cut in half with the chop saw.
The photo above shows the paper inside the cardboard cores.
One of the halves of rolled brown paper was saved for another project.
Here the rolled paper is on top, and the two cardboard cores are below.
Next I used a glue stick to spread a line of glue on the edge of my paper roll.
I carefully centered the roll core on the glued paper edge, and started rolling. (Make sure your roll is rolling evenly!)
I added a couple more lines of glue to keep my roll tight, and from unrolling.
I added paper clips on the ends of the glued side of paper core.
After both sides were paper clipped I turned the rolls around.
The top roll is now the "glued and paper clipped" side.
I used a paper weight to keep the top from rolling up while I work on the other core.
I repeated the glue stick application, and "paper roll up", until I left a stenciling area about 15" long.
I used a stencil from the Folkart Sign Making Variety Pack.
This package is the newest one from Folkart, and is only available on the Plaid Website.
This package is the newest one from Folkart, and is only available on the Plaid Website.
I flipped the roll sides once again so the thicker roll is on top. (Like there's more paper left on the brown paper message roll.)
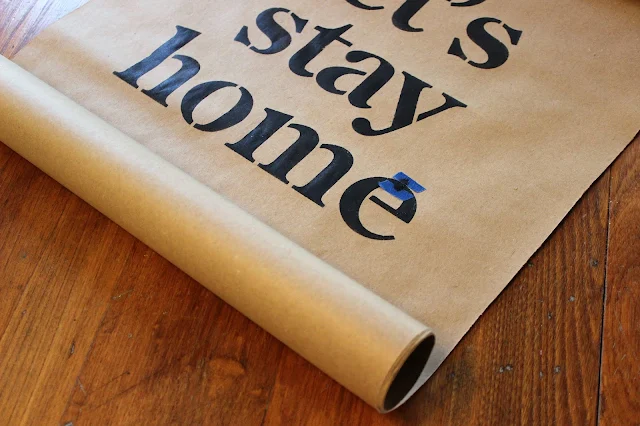
I taped my stencil with very small pieces of blue painter's tape. Be careful not to stick it down too well or you may take some paper fibers off with the tape.
I used small snippets of blue painter's tape around the stencil bridges on the e's, s's and the y.
I then stenciled the bridges closed with a fine stencil brush. You can use a liner brush to close the bridges too, but I prefer this method.
The stenciling is complete.
If you should happen to get a few small dots of stencil bleed here or there, you can fold a small piece of 220 grit sandpaper in fourths and us the inner folded corner to gently sand the bleed.
Be very careful so you don't tear the paper, and use a dry brush to avoid "bleed under the stencil" in the first place.
I then poked a fairly thick jute string through the top core, and tied it in a knot for hanging.
My DIY Stenciled Brown Kraft Paper sign is done!
AND I want to stay home! It was 40 below again this morning!
I still have one half of the rolled paper left over to make another sign!

Sharing is caring


Really cute!
ReplyDelete