"Thrifted" Wood Round & Dollar Tree Rolling Pin To Stenciled Riser/Stool
Dixie Belle Paint,
Dollar Tree,
Re-purposing,
Stenciling,
Thrift Store Finds,
Upcycling,
Vignettes,
Vintage,
January 27, 2019
I saw this round wooden snowman face at one of the thrift shops last week.
Unless you are an artist, snowman faces, signs, etc. are a No-No. I'm not an artist, but I am creative, and I saw the possibilities with this piece and paint and STENCILS.
I paid $1.29 for the snowman face.
(When you click on the bold Amazon, Old Sign Stencils or Dixie Belle Paint Company affiliate links you will be taken to the products I use for this project. If you order it does not change the price or service at all. As an Amazon Affiliate, Old Sign Stencils Affiliate or Dixie Belle Paint Affiliate, I earn from qualifying purchases.)
(When you click on the bold Amazon, Old Sign Stencils or Dixie Belle Paint Company affiliate links you will be taken to the products I use for this project. If you order it does not change the price or service at all. As an Amazon Affiliate, Old Sign Stencils Affiliate or Dixie Belle Paint Affiliate, I earn from qualifying purchases.)
I am pretty sure that the snowman face was drawn on a Mastercraft 1 1/4" x 12" Round Edge Glued Panel from our only big box home improvement center, Menards.
I saved a little money as they are priced at $5.29 plus sales tax.
I stopped at our local Dollar Tree last week.
I see so many bloggers create both useful and decorative stuff from Dollar Store finds. I have made things from Dollar Tree frames, terracotta pots and faux apples, but that is about it.
Not positive if my idea would work or not, but only wasting $2 on a fail, I purchased two wooden rolling pins.
If you have a chop saw, cutting the rolling pins/legs is a little easier than halving them with a saw.
The best way to attach the rolling pin/legs to the wood round is with a dowel screw.
My dowel screws were Grip Fast 3/16" x 1 1/2" screws from Menards.
Make sure to measure four equidistant spots for the legs on the bottom about 3/4" in from the edge.
Drill holes in both the bottom of the wood round and rolling pin leg halves.
I painted the little stool/riser with two coats of Dixie Belle Chalk Finish Paint in Hurricane Gray .
.
I used my Zibra Square Paint Brush on the legs, and my Zibra 2-Inch Paint Brush on the wood round.
I love the Zibra brushes.
*Dixie Belle Paint Company has provided me with complimentary paint products. All opinions about the products are my own.
I used my Zibra Square Paint Brush
I love the Zibra brushes.
*Dixie Belle Paint Company has provided me with complimentary paint products. All opinions about the products are my own.
Once the paint was dry, I was ready to stencil.
I also purchased this Stencil Ease Philodendron Stencil at Hobby Lobby last Monday. I used my 40% off regular price coupon for one item.
I love the stencil's appearance, however, after I tried to put the stencil back in it's packaging, a few leaf splits on the stencil broke off.
The stencil plastic is EXTREMELY brittle. Be careful with it to get more than one use!
I love the stencil's appearance, however, after I tried to put the stencil back in it's packaging, a few leaf splits on the stencil broke off.
The stencil plastic is EXTREMELY brittle. Be careful with it to get more than one use!
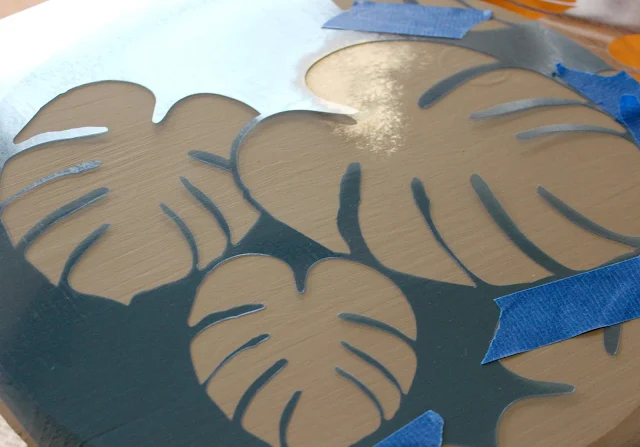
The stencil was too large for my stool/riser, so I settled on these three leaves.
It's much easier to stencil if you tape off areas where the stencil cutouts are narrow, and a stencil brush could pounce paint outside the leaves.
I never pounce the stencil on totally solid.
I like some transparency.
I spoon out some paint on a paper plate, and dip and swirl my brush on the paper plate until I'm sure it's dry enough to stencil. A "too wet" brush will bleed under the stencil.
After I was finished stenciling, I sanded/distressed the stool/riser with 220 grit sandpaper. I went light on the stencils, and a little heavier on the edges. I just distressed one area on the front of each leg with light distressing.
I wiped on a light coat of Dixie Belle Best Dang Furniture Wax in Clear .
.
I use an Intex Pfc Precision-fiber Paint & Cleaning Rags to apply the wax, and one to wipe off any excess wax.
You DO NOT need much wax. Just a light coat. Sealing with wax and/or clear coat or Gator Hide is completely optional.
I use an Intex Pfc Precision-fiber Paint & Cleaning Rags to apply the wax,
You DO NOT need much wax. Just a light coat. Sealing with wax and/or clear coat or Gator Hide is completely optional.
I am going to be concentrating on risers, crates, trays, drawers, etc. this week to use in vignettes.
I love all of the above for creating vignettes.
This riser/stool adds vertical interest to my vignette. Otherwise, everything would be on the shelf on one level.
I just stuffed a couple of books under under my riser. They didn't fit lying down, but they fit on a diagonal.
Other items in my vignette include a small white pitcher, wooden spools, a vintage pair of eyeglasses (my grandma's), a wooden crochet hook, and a split leaf philodendron from Hobby Lobby to coordinate with the riser stencil.
I am seeing tropical leaf/philodendron leaves out there in decor land, and I like them.
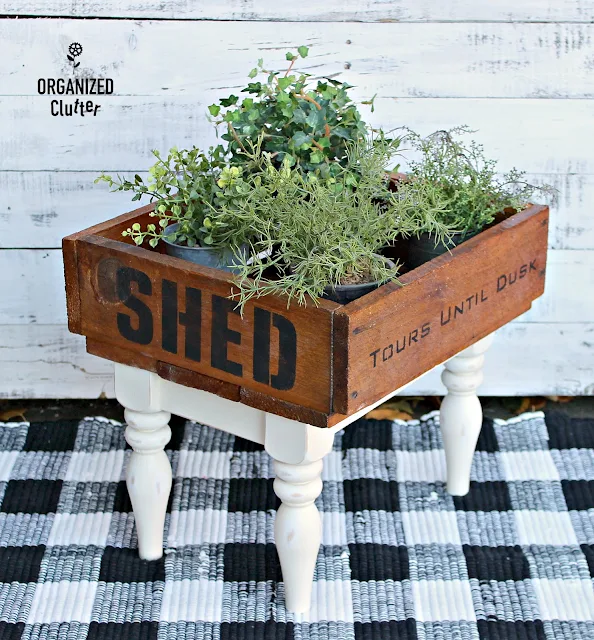
Another fun decor riser project is my vintage crate with thrifted stool legs!

Sharing is caring


What a clever idea, and super cute riser! I love that stencil!
ReplyDeleteLove your stools, Carlene. I really like the gray color you chose and the short legs. I thought you might use it on the counter or another table. It looks great!
ReplyDeleteTurned out really cute. You are very creative. I will have to shop Dollar Tree for some of those legs. I have lots of round boards.
ReplyDelete