Thrifted MidCentury Coffee Table Makeover With Dixie Belle Paint & A Transfer From Redesign With Prima
Decor Transfers,
Dixie Belle Paint,
Furniture Update,
Redesign With Prima,
Thrift Store Finds,
Upcycling,
September 24, 2021
Do you remember this little $10 thrift shop find from Goodwill in the Twin
Cities?
It had midcentury modern legs but was definitely very very plain.
(When you click on the bold Amazon, Old Sign Stencils or Dixie Belle Paint Company affiliate links you will be taken to the products I use for this project. If you
order it does not change the price or service at all. As an Amazon
Affiliate, Old Sign Stencils Affiliate or Dixie Belle Paint Affiliate, I
earn from qualifying purchases.)
After cleaning the table up with hot soapy Dawn Dish Soap water, I brushed on
a couple of coats of Dixie Belle Chalk Finish Paint in Caviar. This is my favorite black paint!
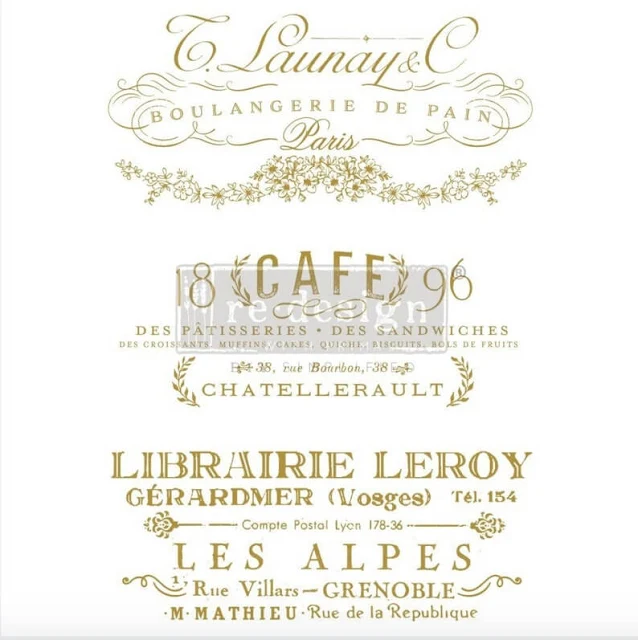
I pulled out a French decor transfer tube from Redesign with Prima, with gold lettering, that I have had for a while. It was called "Somewhere in France". I used the center part of the transfer on an earlier stool project.
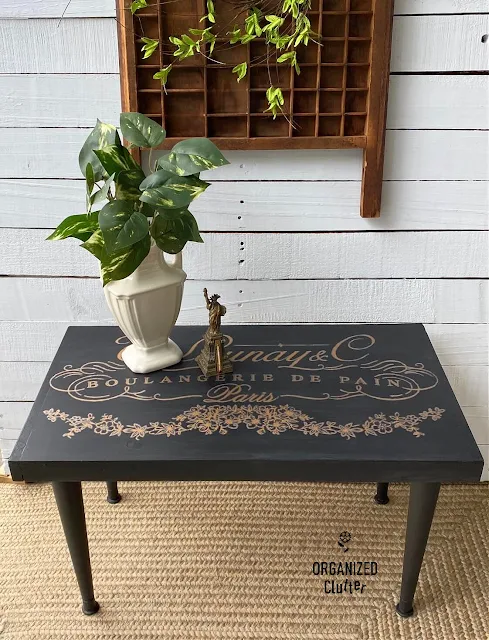
The top section of the transfer fit the top of this table perfectly.
I centered the transfer on all sides using a ruler. I then taped the top middle with blue painter's tape to keep the transfer from moving.
I then lifted the transfer, without removing the tape, and removed the white paper backing. Then flipped the transfer back down on the table.
I used the rectangular stick enclosed in the design transfer tube, and rubbed on the design. I always pull up the clear plastic by a top corner first, slowly, making sure the transfer is all stuck down before continuing to pull up more of the plastic.
The gold transfer is really showy on the black paint.
I painted the metal bottom part of the legs black as well.
I applied General Finishes Flat Out Flat Topcoat with my Dixie Belle Blue Sponge Applicator.
I very lightly dampen the sponge applicator, and spooned some of the topcoat onto a small coated paper plate. I dipped the whole bottom of the sponge into the topcoat, and wiped the excess off on the side of the paper plate. Then, I sealed the legs first, flipped the table over and applied topcoat to the topside.
Before using the sponge applicator, I viewed this video from the Serial DIYer. Christy has a great DIY video using a sponge applicator to apply topcoat.
The little table would be perfect in front of a loveseat, or in a small apartment.
Thanks for visiting!
Pin for later!

Sharing is caring


You made an ordinary table look elegant and unique!
ReplyDelete